HOW TO > Introduction of operation methods
HOW TO
Introduction of operation methods & procedures

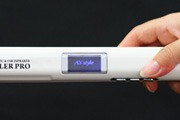
SONIC STYLER PRO Introduction of operation
1. Activate
 First, connect to the socket and check if the display flickers.

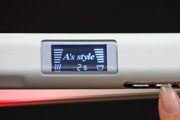
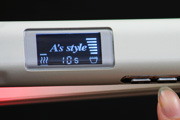
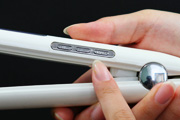 When you press ON/OFF button for 2 seconds, the display is put on.
You can use the product soon from this situation.
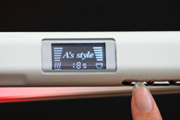
 The display shows the adjusted amounts of ultrasound (right) & far infra
red ray (left) and operation seconds (middle).
2. Setting of ultrasound & far infrared ray and operation seconds
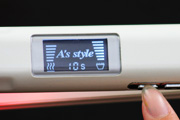
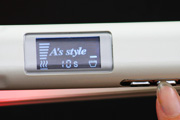
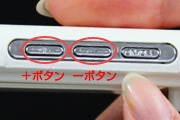 Set up the using time of the ultrasound & far infrared ray produced at the time of pressing. You can adjust the using time by +/- button in the condition where the display is put on.
 This product can produce ultrasound & far infrared ray for 18 seconds at the maximum. In case that the hairs are fat or strongly curly, set longer seconds.
The minimum number of seconds is 2 seconds. If you set the minimum seconds for those who have fine hairs, it becomes the time standard when you press the product.
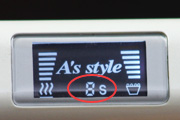
3. Ultrasound setting
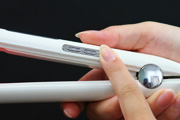
Conduct the setting of ultrasound. Press ON/OFF button only once in the condition where the display is put on. When the meter icon on the right side flickers, adjust by the +/- button.
 The product has 7 levels. In case of permeating to the whole of the hairs quickly and fully, you should set to 6 or 7, and you can do some treatment by the fine vibration whose frequency is numerous.
 In case that the hairs are fat or that you want to permeate firmly, we recommend level 1 or 2. The big and strong vibration surely permeates liquid agents to the hair cores.
4. Setting the amount of far infrared ray
Set up the amount of far infrared ray. Press ON/OFF button twice in the condition where the display is put on. When the meter icon on the left side flickers, adjust by the +/- button.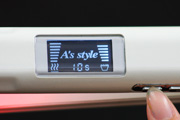 The product has 7 levels. In case of doing any treatment for those who have fat hairs or strongly curly hairs, we recommend level 6 or 7.
The minimum level is 1. In case of those who have fine hairs or want to get perms loosely, please adjust to small levels.
5. Motion during the usage
 During pressing the ultrasound hair iron,
the using seconds are counted down.
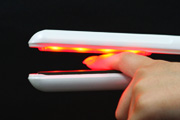 The ultrasound hair iron never produces any fever
even in the middle of usage.
6. Stop
Press the ON/OFF button for 2 seconds as you did for activation, and the hair iron stops. Please absolutely unplug and store it.